Hey there, tech enthusiasts! Let’s dive straight into the world of IoT and explore something truly exciting. AWS IoT Device Management on Raspberry Pi is not just a buzzword anymore; it’s a game-changer in the tech landscape. Whether you’re a hobbyist, a developer, or someone who’s just curious about IoT, this is your golden ticket to understanding how AWS IoT Device Management works seamlessly with Raspberry Pi. So, buckle up and let’s get started, shall we?
Imagine being able to manage, monitor, and secure all your IoT devices from one centralized platform. Sounds pretty awesome, right? Well, that’s exactly what AWS IoT Device Management offers. With Raspberry Pi as your hardware backbone, you can create smart solutions that are both scalable and cost-effective. This article will walk you through everything you need to know to harness the power of AWS IoT and Raspberry Pi.
Before we dive deeper, let’s set the stage. AWS IoT Device Management is like having a personal assistant for all your IoT devices. It helps you organize, track, and update your gadgets effortlessly. And when you pair it with Raspberry Pi, you’re opening up endless possibilities for innovation. Keep reading to find out more!
Read also:Mary Holland The Rising Star Whos Making Waves In The Industry
Understanding AWS IoT Device Management
So, what exactly is AWS IoT Device Management? Simply put, it’s a cloud-based service that allows you to manage millions of IoT devices from a single interface. You can onboard devices, organize them into groups, monitor their health, and even push over-the-air updates. This service is designed to simplify the complexities of IoT management, making it accessible to developers of all skill levels.
Here’s why AWS IoT Device Management stands out:
- Scalability: Manage thousands of devices without breaking a sweat.
- Security: Built-in security features to protect your devices and data.
- Efficiency: Streamline device management tasks with automation.
- Compatibility: Works seamlessly with a wide range of IoT devices.
Whether you’re building a smart home system, an industrial automation solution, or a connected health device, AWS IoT Device Management has got you covered. And when you combine it with Raspberry Pi, the possibilities are truly limitless.
Why Raspberry Pi Is the Perfect Partner
Raspberry Pi has long been a favorite among hobbyists and developers alike. This tiny yet powerful single-board computer offers a perfect blend of affordability, flexibility, and performance. When paired with AWS IoT Device Management, Raspberry Pi becomes an even more formidable tool for creating smart solutions.
Here’s what makes Raspberry Pi such a great match:
- Cost-Effective: Raspberry Pi is one of the most budget-friendly options for IoT projects.
- Versatile: Supports a wide range of sensors, actuators, and peripherals.
- Community Support: A vast community of developers ready to help you out.
- Open Source: Fully customizable to suit your specific needs.
With Raspberry Pi, you can prototype and test your IoT ideas quickly and efficiently. And once you’ve got your project up and running, AWS IoT Device Management ensures that it remains secure and up-to-date.
Read also:Ayelet Zurer Unveiling The Allure Of A Talented Star
Setting Up AWS IoT Device Management
Alright, let’s get our hands dirty and set up AWS IoT Device Management. First things first, you’ll need an AWS account. If you don’t have one already, head over to the AWS website and sign up for a free tier account. Once you’re logged in, follow these steps:
Step 1: Create a Thing
A “thing” in AWS IoT terminology is essentially a representation of your IoT device. To create a thing, go to the AWS IoT Core console and click on “Manage” > “Things” > “Create a thing.” You’ll need to provide a name for your thing and select a thing type if applicable.
Step 2: Set Up Security
Security is paramount when it comes to IoT devices. AWS IoT Device Management provides robust security features to protect your devices and data. You’ll need to create certificates and policies to authenticate your devices. Don’t worry; the AWS console makes this process pretty straightforward.
Step 3: Configure Rules
Rules are like instructions that tell AWS IoT Device Management what to do with the data coming from your devices. You can configure rules to send data to AWS services like S3, DynamoDB, or Lambda for further processing.
By following these steps, you’ll have your AWS IoT Device Management environment up and running in no time. Now, let’s move on to integrating Raspberry Pi.
Integrating Raspberry Pi with AWS IoT Device Management
Integrating Raspberry Pi with AWS IoT Device Management is easier than you might think. Here’s a step-by-step guide to get you started:
Step 1: Install the AWS IoT SDK
The AWS IoT Device SDK is a software development kit that allows your Raspberry Pi to communicate with AWS IoT Device Management. You can download the SDK from the AWS GitHub repository and install it on your Raspberry Pi using pip.
Step 2: Configure the SDK
Once the SDK is installed, you’ll need to configure it with your AWS credentials. This involves setting up the region, endpoint, and certificates. The AWS documentation provides detailed instructions on how to do this.
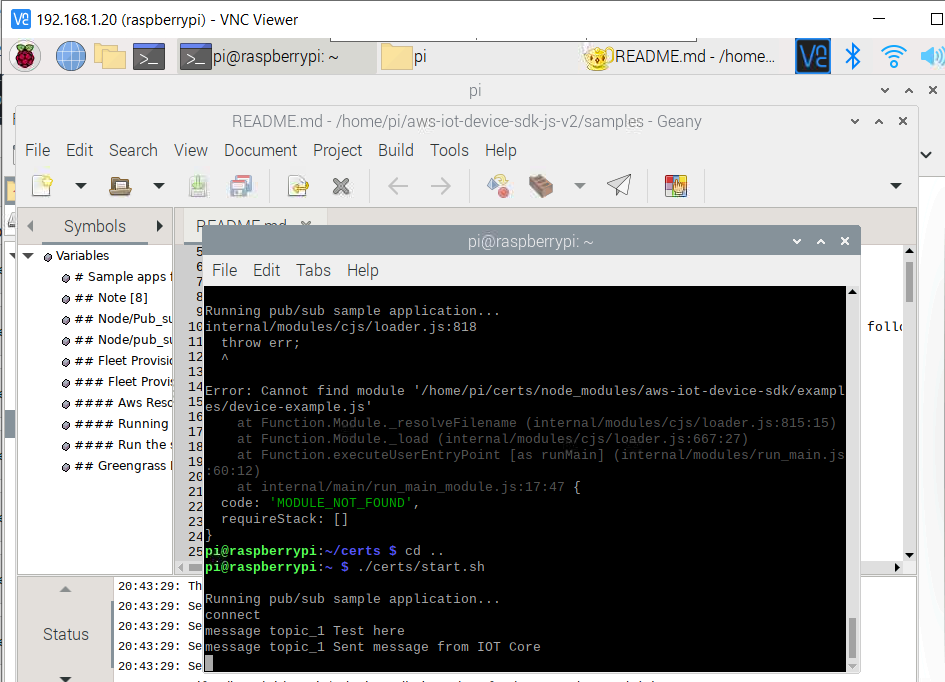
Step 3: Write Your Code
Now comes the fun part—writing the code to interact with AWS IoT Device Management. You can use Python or C++ to write your applications. AWS provides plenty of sample code to help you get started.
With these steps, your Raspberry Pi will be communicating with AWS IoT Device Management in no time. Let’s explore some use cases to see how this integration can be applied in real-world scenarios.
Use Cases for AWS IoT Device Management with Raspberry Pi
The combination of AWS IoT Device Management and Raspberry Pi opens up a world of possibilities. Here are a few use cases to inspire your next project:
Smart Home Automation
Create a smart home system that allows you to control lights, thermostats, and security systems from your smartphone. AWS IoT Device Management ensures that all your devices are securely connected and up-to-date.
Industrial Automation
Monitor and control industrial equipment in real-time. Use Raspberry Pi to collect sensor data and send it to AWS IoT Device Management for analysis. This can help improve efficiency and reduce downtime.
Connected Health Devices
Develop health monitoring devices that send vital signs to the cloud for analysis. AWS IoT Device Management provides the security and reliability needed for such critical applications.
These are just a few examples of what you can achieve with AWS IoT Device Management and Raspberry Pi. The only limit is your imagination!
Best Practices for AWS IoT Device Management
To get the most out of AWS IoT Device Management, here are some best practices to keep in mind:
- Use strong authentication and encryption to protect your devices and data.
- Regularly update your devices to ensure they have the latest features and security patches.
- Monitor your devices’ performance and health to identify and resolve issues quickly.
- Organize your devices into logical groups to simplify management.
By following these best practices, you’ll be able to create robust and reliable IoT solutions.
Common Challenges and How to Overcome Them
Like any technology, AWS IoT Device Management and Raspberry Pi come with their own set of challenges. Here are some common issues and how to overcome them:
Challenge 1: Connectivity Issues
If your Raspberry Pi is having trouble connecting to AWS IoT Device Management, check your network settings and ensure that the necessary ports are open. Also, verify that your certificates are correctly configured.
Challenge 2: Security Concerns
IoT security is a hot topic, and rightly so. To mitigate security risks, use strong passwords, enable two-factor authentication, and regularly update your devices.
Challenge 3: Scalability
As your IoT project grows, you may encounter scalability issues. AWS IoT Device Management is designed to handle millions of devices, but you’ll need to plan your architecture carefully to ensure smooth scaling.
By addressing these challenges head-on, you’ll be able to build IoT solutions that are both secure and scalable.
Conclusion: Take Action Today
And there you have it—a comprehensive guide to AWS IoT Device Management with Raspberry Pi. From setting up your environment to exploring real-world use cases, we’ve covered everything you need to know to get started. AWS IoT Device Management and Raspberry Pi are a powerful duo that can help you bring your IoT ideas to life.
So, what are you waiting for? Grab your Raspberry Pi, sign up for AWS, and start building your next big thing. And don’t forget to share your experiences and projects with the community. Who knows? You might just inspire someone else to embark on their own IoT journey.
Table of Contents
- AWS IoT Device Management with Raspberry Pi: Your Ultimate Guide
- Understanding AWS IoT Device Management
- Why Raspberry Pi Is the Perfect Partner
- Setting Up AWS IoT Device Management
- Integrating Raspberry Pi with AWS IoT Device Management
- Use Cases for AWS IoT Device Management with Raspberry Pi
- Best Practices for AWS IoT Device Management
- Common Challenges and How to Overcome Them
- Conclusion: Take Action Today
Remember, the future of IoT is here, and with AWS IoT Device Management and Raspberry Pi, you have the tools to shape it. Happy coding and stay curious!